Subaru Forester: Replacement of wiper blades
Grease, wax, insects, or other material on the windshield or the wiper blade results in jerky wiper operation and streaking on the glass. If you cannot remove the streaks after operating the windshield washer or if the wiper operation is jerky, clean the outer surface of the windshield (or rear window) and the wiper blades using a sponge or soft cloth with a neutral detergent or mild-abrasive cleaner. After cleaning, rinse the windshield and wiper blades with clean water. The windshield is clean if beads do not form when you rinse the windshield with water.

- Do not clean the wiper blades with gasoline or a solvent, such as paint thinner or benzine. This will cause deterioration of the wiper blades.
- While removing the wiper blades from the wiper arms, do not return the wiper arms to the original positions. Otherwise, the windshield surface may be scratched.
- When returning the raised wiper arms to the original positions, carefully return the wiper arms on the windshield while supporting them with your hands. You should not return the wiper arms to the windshield only by the return spring. Otherwise, the wiper arms may be deformed and/ or the windshield surface may be scratched.
If you cannot eliminate the streaking even after following this method, replace the wiper blades using the following procedures.
Windshield wiper blade assembly
1. Raise the wiper arm off the windshield.
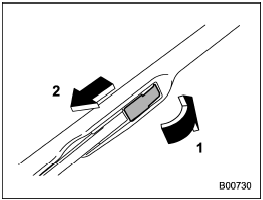
1) Open the cover
2) Pull down the wiper blade
2. Remove the wiper blade assembly by opening the cover and pulling it down in the direction shown in the illustration.
3. Install the wiper blade assembly to the wiper arm. Make sure that it locks in place.
4. Hold the wiper arm by hand and slowly lower it in position.
Windshield wiper blade rubber
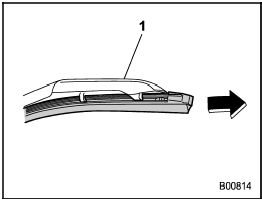
1) Support
1. Grasp the locked end of the blade rubber assembly and pull it firmly until the stoppers on the rubber are free of the support.
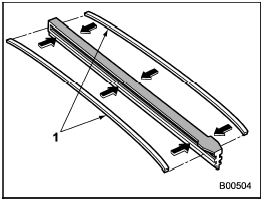
1) Metal spines
2. If the new blade rubber is not provided with two metal spines, remove the metal spines from the old blade rubber and install them in the new blade rubber.
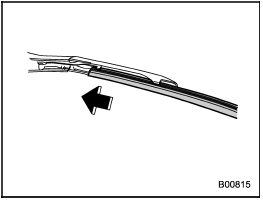
3. Align the claws of the support with the grooves in the rubber and slide the blade rubber assembly into the support until it locks.
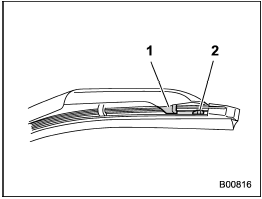
1) Claw
2) Stopper
4. Be sure to position the claws at the end of the support between the stoppers on the rubber as shown. If the rubber is not retained properly, the wiper blade may scratch the windshield.
Rear window wiper blade assembly
1. Raise the wiper arm off the rear window.
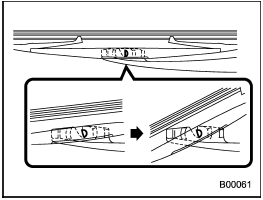
2. Turn the wiper blade assembly counterclockwise.
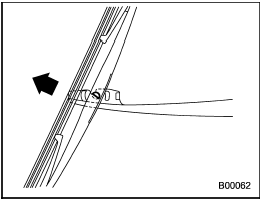
3. Pull the wiper blade assembly toward you to remove it from the wiper arm.
4. Install the wiper blade assembly to the wiper arm. Make sure that it locks in place.
5. Hold the wiper arm by hand and slowly lower it in position.
Rear window wiper blade rubber
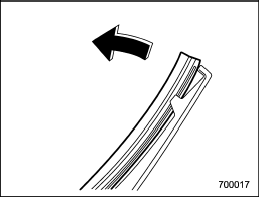
1. Pull out the end of the blade rubber assembly to unlock it from the plastic support.
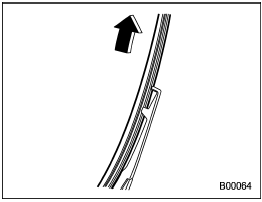
2. Pull the blade rubber assembly out of the plastic support.
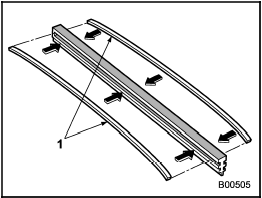
1) Metal spines
3. If the new blade rubber is not provided with two metal spines, remove the metal spines from the old blade rubber and install them in the new blade rubber.
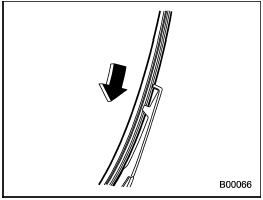
4. Align the claws of the plastic support with the grooves in the blade rubber assembly, then slide the blade rubber assembly into place.
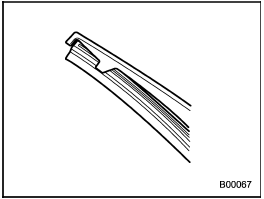
Securely retain both ends of the rubber with the stoppers on the plastic support ends. If the rubber is not retained properly, the wiper may scratch the rear window glass.
See also:
Washing the exterior
Wash your vehicle regularly with cool or lukewarm water and a neutral
pH shampoo, such as Motorcraft Detail Wash (ZC-3-A), which is
available from your authorized dealer.
• Never use strong household detergents or soap, such as dish washing
or ...
Useful information
This Operator's Manual describes all models and all standard and optional equipment
of your vehicle available at the time of publication of the Operator's Manual. Country-specific
differences are possible. Please note that your vehicle ...

 Windshield washer fluid